Step 1 : Download and install Java in your system
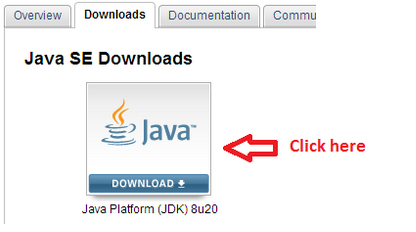
First of all you need to install JDK (Java development kit) in your system. To download java Click here and install it in your system.
Step 2 : Download and install Eclipse
Download Eclipse and save it in any drive. It’s free.

Step 3 : Download WebDriver Jar Files.
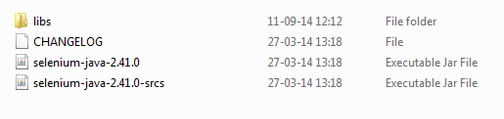
Selenium WebDriver supports many languages and each language has its own client driver. Here we are configuring selenium 2.0 with Java so we need ‘Webdriver Java client driver’. Click here for WebDriver download file. On that page click on ‘Download’ link of java client driver as shown.

Extract and save it in your system in any Drive. There will be ‘libs’ folder, 2 jar files and change log in unzipped folder. We will use all these files for configuring WebDriver in eclipse as shown.
Step 4 : Start Eclipse and configure it with selenium 2 (WebDriver)
- Select WorkSpace on eclipse start up
Double click on ‘eclipse.exe’ to start eclipse. Create new folder in a drive with name ‘workspace’ and select it as your Workspace where your work will be stored and click Ok as shown.

Now Eclipse will open
- Create new Project
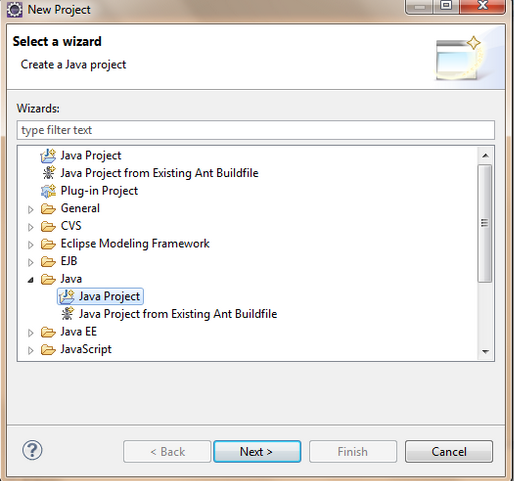
Create new java project from File > New > Project > Double click Java Project and give your project name ‘testproject’ as shown.
Click on ‘Finish’ Button.

Created project ‘testproject’ will be shown on eclipse

- Create new Package
Right click on ‘testproject’ and select New > Package.

Give your package name ‘testpackage’ and click ‘Finish’ as shown.

- Create new Class
Right click on ‘testpackage’ and select New > Class.

Give your class name ‘TestClass’ and click ‘Finish’ as shown.

Your Eclipse window will look like as shown.

- Add External jar files to Java build path
– Right click on project ‘testproject’ > Select Properties > Select Java build path > Navigate to Libraries tab.
– Click on Add external JARs button > select both .jar files from the folder in the drive.
– Click on add external JARs button > select all .jar files from the folder in the drive.
Your ‘testproject’ properties dialog will be shown as below

Next be ready to write your first WebDriver Script with Eclipse. Let’s get started !!
